Create your first screen recording with zensnap
Your complete guide to create your first screen recording in minutes. No download or installation required.
Welcome to zensnap!
zensnap makes screen recording incredibly simple. Whether you're creating a tutorial, documenting a bug, presenting a demo, or sharing knowledge with your team, you can start recording in seconds - right from your browser. No downloads, no installations, no hassle.
Quick Start (30 seconds)
- Go to zensnap.io/record-video
- Click "Start Recording" and choose what to record
- Grant browser permissions when prompted
- Click the record button to begin
- Click stop when finished & your video is ready to share!
Step-by-Step Guide
Open the Recorder
Navigate to the recording page at zensnap.io/record-video. You'll see the recording interface with options to configure your recording.
Pro tip: Bookmark this page for quick access whenever you need to record!

Configure Recording Options
Before you start recording, configure your settings:
Audio Settings
- Microphone: Toggle on to include your voice narration or commentary
- System Audio: Capture sounds from your computer (browser/OS dependent)
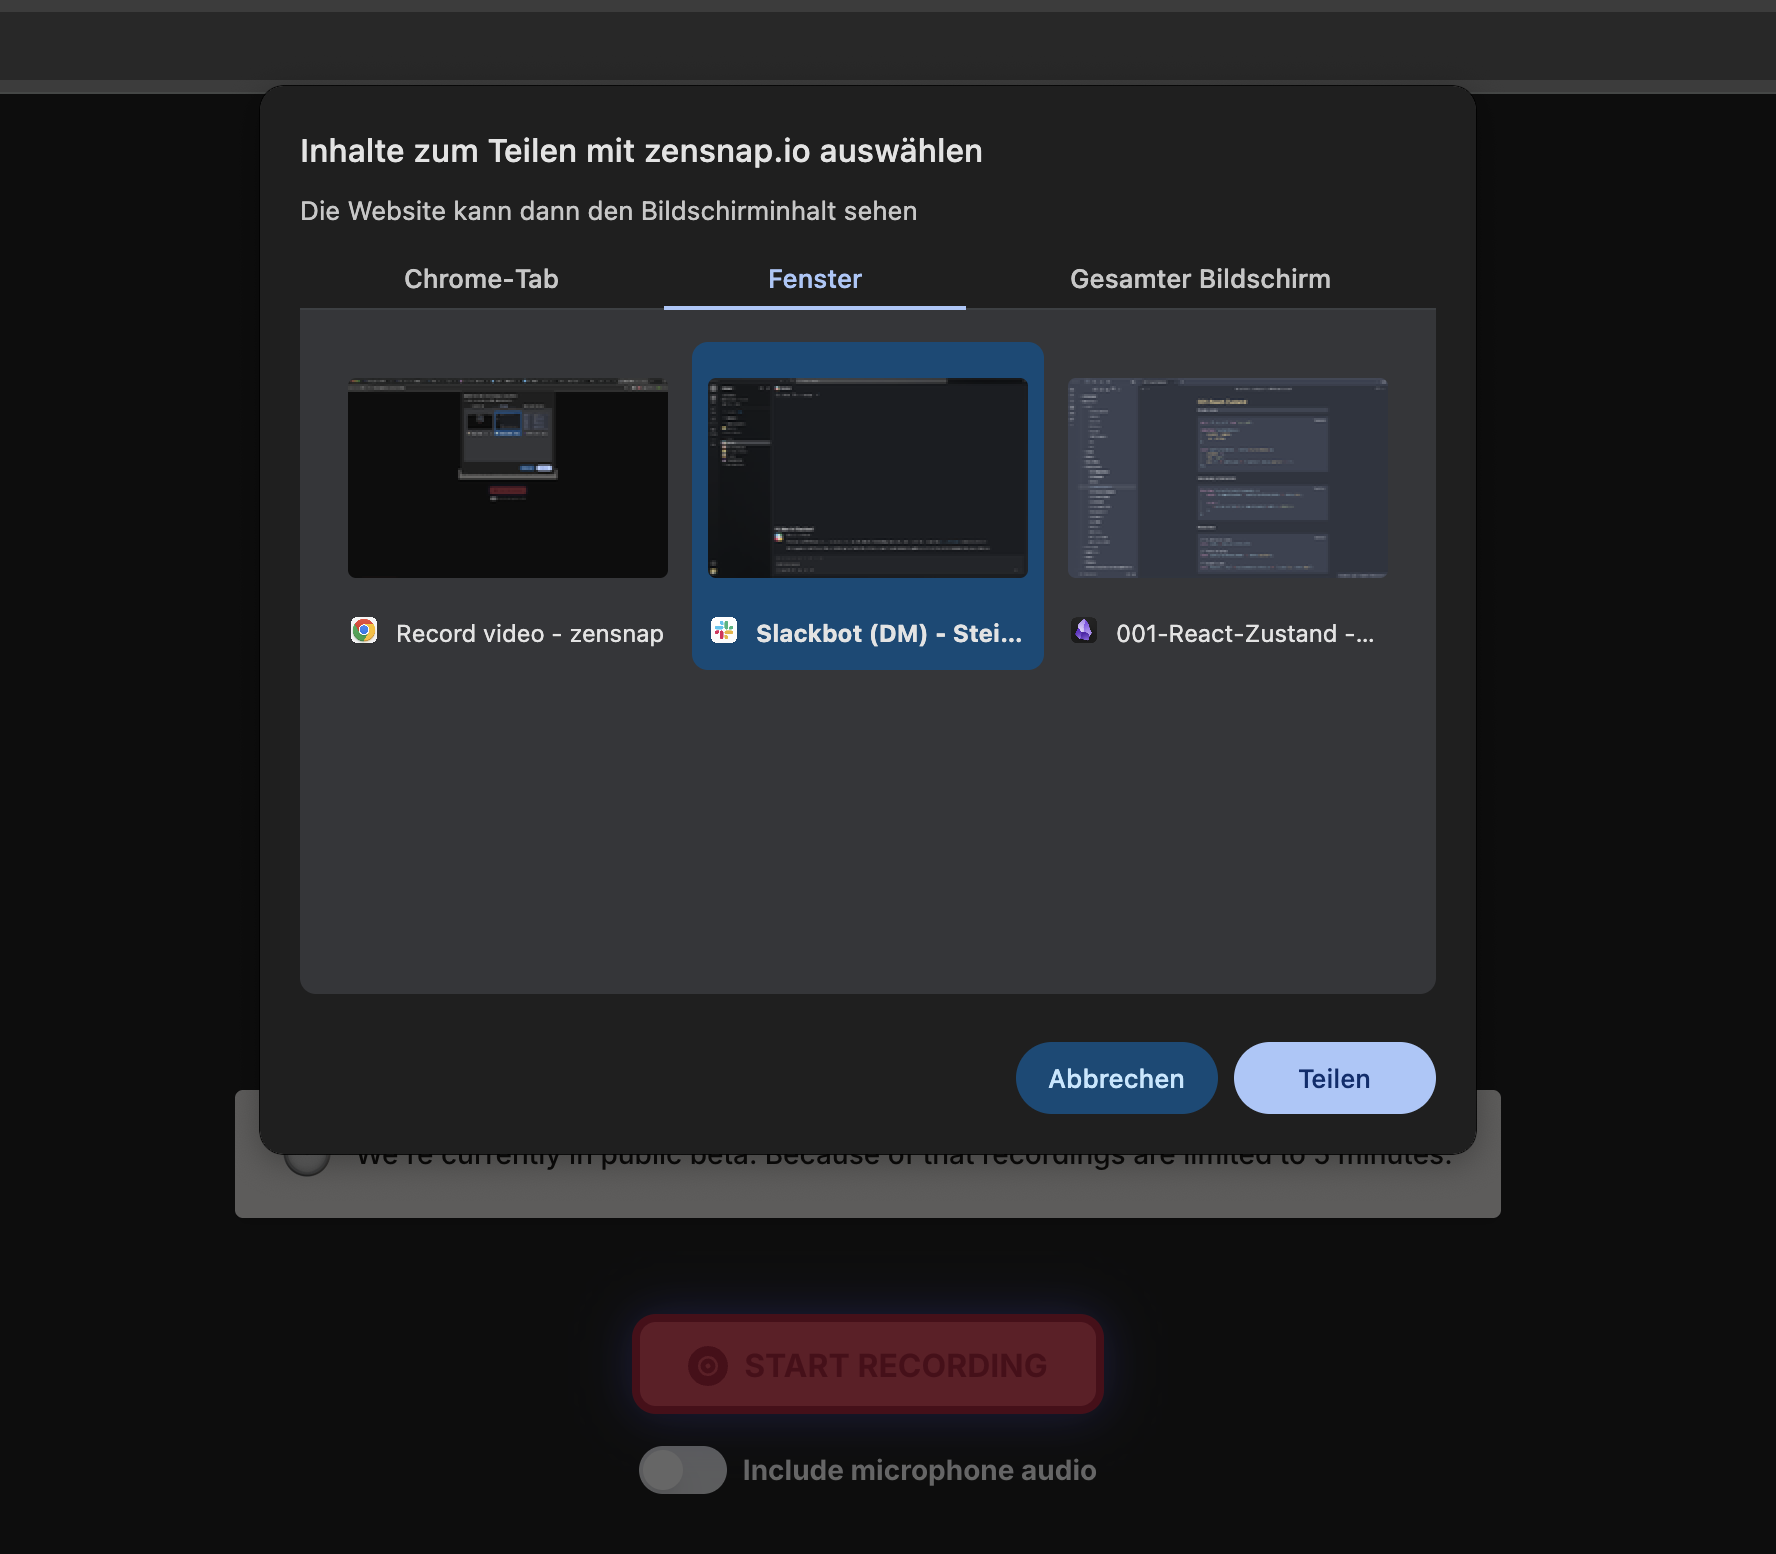
Choose What to Record
Click the "Start Recording" button. Your browser will prompt you to select what you want to capture:
Entire Screen
Capture everything on your monitor. Perfect for comprehensive demos or presentations.
Application Window
Record a specific application window. Great for focused tutorials without distractions.
Browser Tab
Capture just one browser tab. Ideal for web-based demos and online presentations.
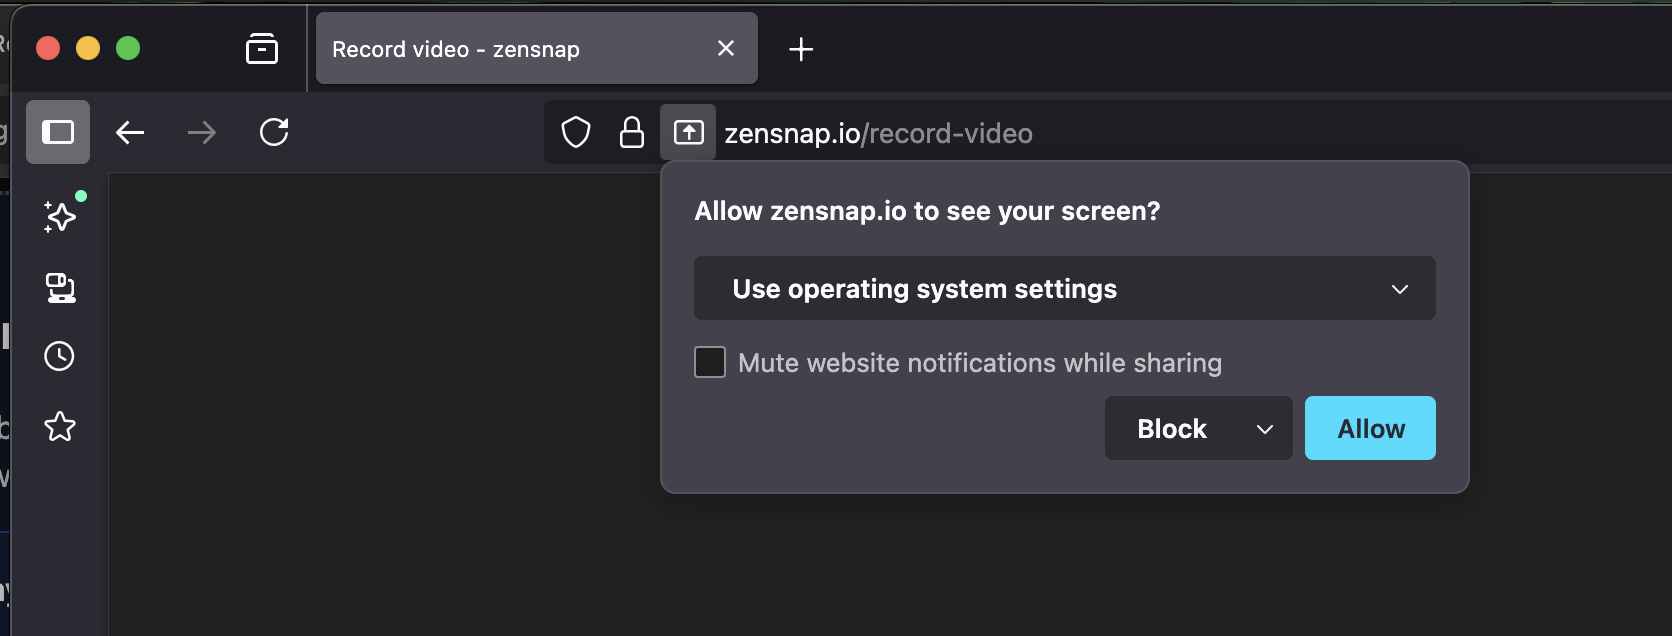
Grant Permissions
Your browser will ask for permission to access your screen and (if enabled) your microphone and webcam. Click "Allow" or "Share" to grant the necessary permissions.
Why do I need to grant permissions?
For security and privacy, browsers require your explicit consent before any website can access your screen, microphone, or camera. These permissions are required for zensnap to record.
Important: You can revoke these permissions at any time through your browser settings. zensnap only records when you explicitly click the record button.
Start Recording
Once permissions are granted, you'll see a preview of what will be recorded. Click the record button to begin capturing.
You may see a brief countdown (3-2-1) before recording starts, giving you time to prepare.
Recording Controls:
- Record Button: Start capturing your screen
- Pause Button: Temporarily pause recording (you can resume anytime)
- Stop Button: End the recording and save your video
Stop and Save
When you're finished recording, click the stop button. zensnap will automatically process your recording and display it on the video player page.
The processing usually takes just a few seconds, depending on the length of your recording.
Share Your Recording
Once processing is complete, you'll be on the video player page where you can:
- Preview your video: Watch it back to make sure everything looks good
- Copy the share link: Instantly share with anyone via email, chat, or social media
- Download as MP4: Save a copy to your computer for offline use or uploading elsewhere
- Add password protection: Secure your video with a password (requires account)
- Delete the video: Remove it from zensnap servers when you're done
Tips for Better Recordings
Before Recording
- Close unnecessary applications and browser tabs
- Disable notifications to avoid interruptions
- Prepare what you want to show in advance
- Test your microphone if you're recording audio
- Make sure you have enough disk space
During Recording
- Speak clearly and at a steady pace
- Move your cursor deliberately to help viewers follow along
- Use the pause feature if you need to collect your thoughts
- Keep recordings under 5 minutes when possible (current limit)
- Don't rush - take your time to explain clearly
After Recording
- Watch your recording before sharing to check quality
- Add a password if the content is sensitive
- Download a backup copy for important recordings
- Share the link with context - tell recipients what they're watching
Browser Compatibility
zensnap works best on modern browsers with full screen recording support:
Note: Mobile browsers are not currently supported. Please use a desktop or laptop computer.
Frequently Asked Questions
Do I need to create an account?
No! You can start recording immediately without signing up. However, creating a free account gives you access to additional features like password protection, video management from your dashboard, and the ability to track your recordings.
How long can my recordings be?
Currently, zensnap supports recordings up to 5 minutes in length. Support for longer recordings is coming soon.
What format are the recordings saved in?
All recordings are saved as MP4 files, which is a widely-supported format that works on virtually all devices and platforms.
Is my recording private?
Yes! Your recordings are completely private by default. Only people who have the unique link can view your recording. You can also add password protection for an extra layer of security.
Can I edit my recording after I've finished?
zensnap currently doesn't offer editing features. However, you can download your recording and edit it using video editing software of your choice, then re-upload or share the edited version.
How long are recordings stored?
Recordings are stored on zensnap servers. If you're a registered user, your recordings remain available in your dashboard until you choose to delete them. We recommend downloading important recordings for safekeeping.
What if I encounter an error?
Check out our Help Center for troubleshooting guides, or refer to the FAQ section on our homepage for common issues and solutions.
Next Steps
Now that you know the basics, you're ready to create amazing screen recordings! Here are some helpful resources: